
Are you facing the frustrating issue of "Why is my camera not working on Google Meet"? You're not alone. This guide aims to unravel the mystery behind this common problem and provide actionable solutions. By delving into the troubleshooting methods, you'll gain insights into resolving the issue swiftly.
Whether it's a permissions issue, browser compatibility, an error message, or a settings glitch, let us equip you with the knowledge to overcome these hurdles quickly. Keep reading to regain access to your video conferencing experience and ensure effortless communication in your virtual meetings.
7 Troubleshooting Tips For Your Google Meet Camera
Experiencing camera issues on Google Meet can disrupt your video conferencing sessions. Fear not! We've compiled six troubleshooting tips to help you resolve these issues swiftly and get back to seamless meetings. Here's how to access your camera now:
1. Test your camera and connection before the meeting
Before joining or even sending a Google Meet invite, it's wise to conduct a quick test to ensure your camera and internet connection are functioning correctly. Google Meet provides an option to "Join or start a meeting" with just yourself. Use this feature to verify that your camera displays properly, your audio is clear, and there are no connectivity issues.
This pre-meeting check can save you from potential disruptions during important discussions or presentations.
2. Make sure Google Meet has camera access
Upon joining a meeting, the Google Meet app will prompt for camera access. Denying the camera permission will result in a black screen. To fix this, give the Google Meet camera permission to use your camera. Here's how to grant camera access on Google Chrome:
1. Log into your Google Meet meeting.
2. In the address bar, you'll see a video icon next to the Google Meet URL. Click on this icon.
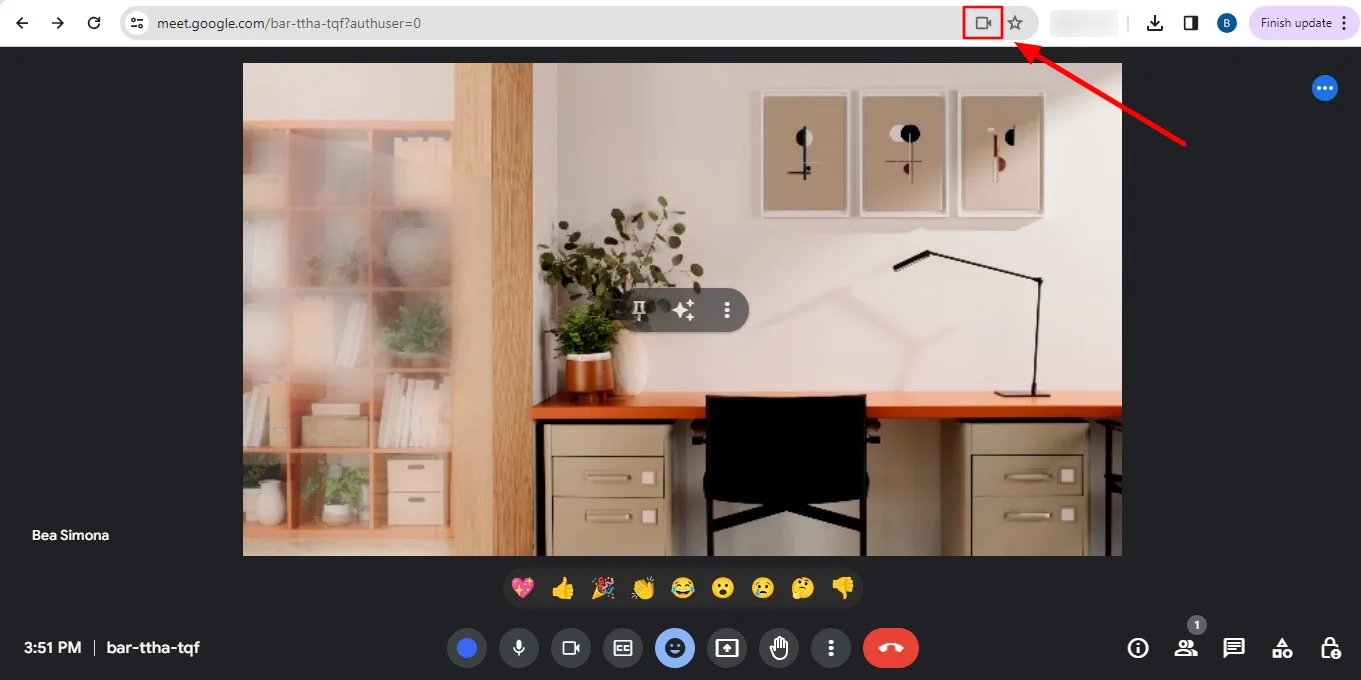
3. Tap the video icon, choose the first option, and click "done".
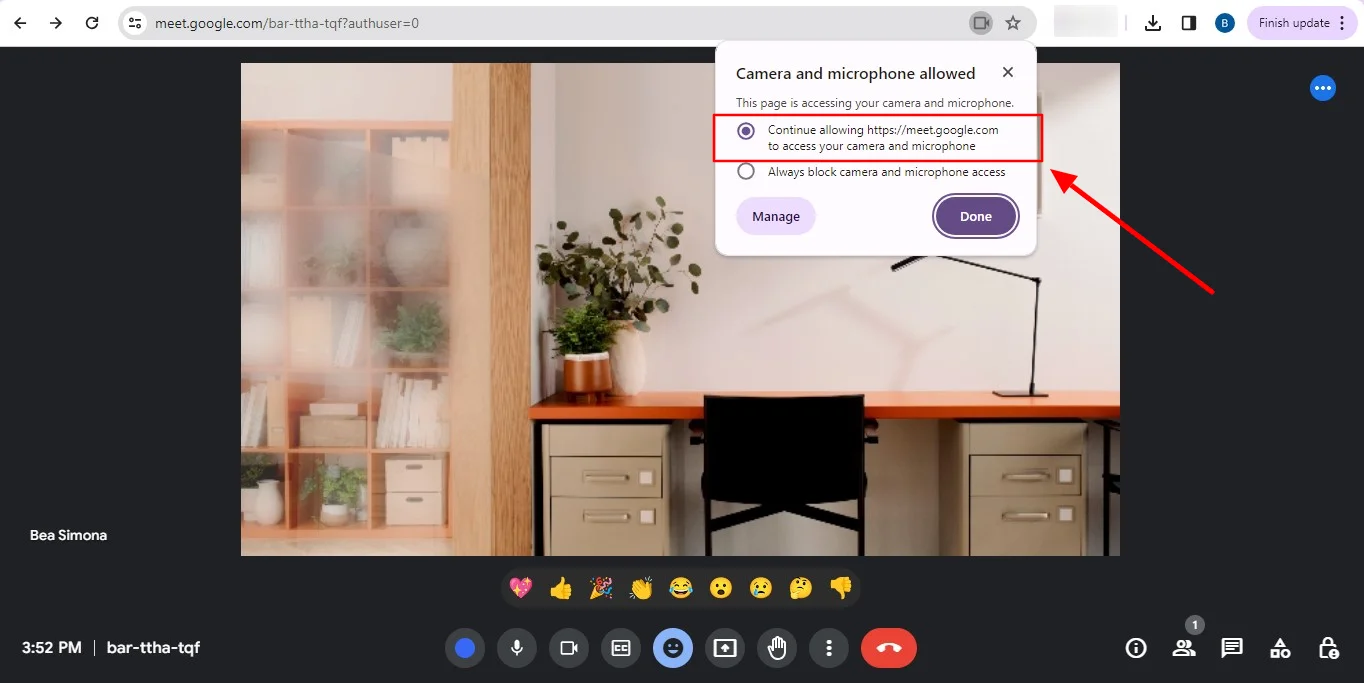
4. Your camera should now be accessible to Google Meet on Chrome.
3. Check to make sure no other app is using the camera
If other background applications are using your camera and microphone too, Google Meet won't be able to use it or display the video. Although your camera won't display you in the meeting, you'll still be able to see everyone in the Google Meet. Ensure no other video conferencing apps like Zoom or Microsoft Teams are accessing your camera.
If your laptop's camera indicator light is on, find and close any other apps still using the camera in the background. Afterward, join the Google Meet meeting and click the camera icon to enable your webcam.
4. Check your antivirus software
Ensure to review antivirus programs with web protection features and functionalities as they might block the webcam and access to the camera functions automatically. If these antivirus solutions have settings like "Block Access to webcam for all applications," ensure to uncheck it. Alternatively, temporarily disable them to assess any potential impact on your camera usage.
5. Check the camera settings in Google Meet
Google Meet typically uses your system's built-in camera application. Having more than one camera connected to your device can lead the app to select the wrong one, particularly on Windows. However, if you prefer to have multiple cameras or use a third-party camera app, you'll need to adjust and fix Google Meet camera settings accordingly. Here's how to change the default camera:
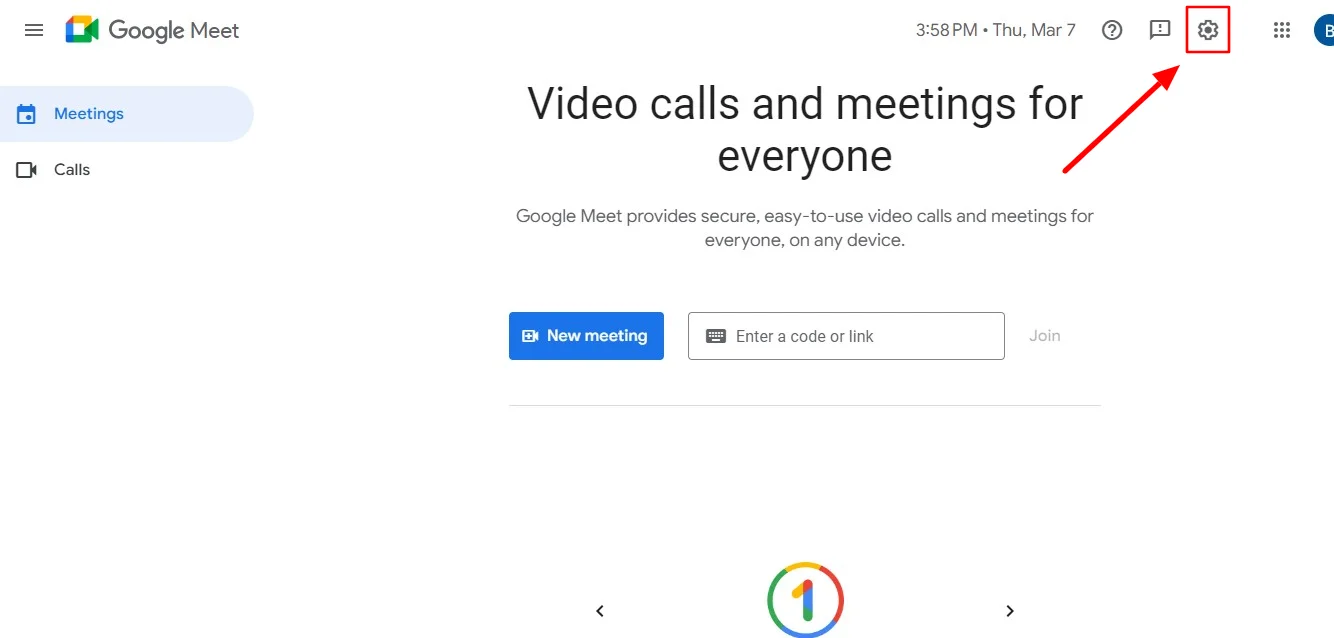
1. Launch Google Meet in your browser.
2. Click the Gear icon located in the top-right corner to access settings.
3. Navigate to the video tab on your left-hand side.
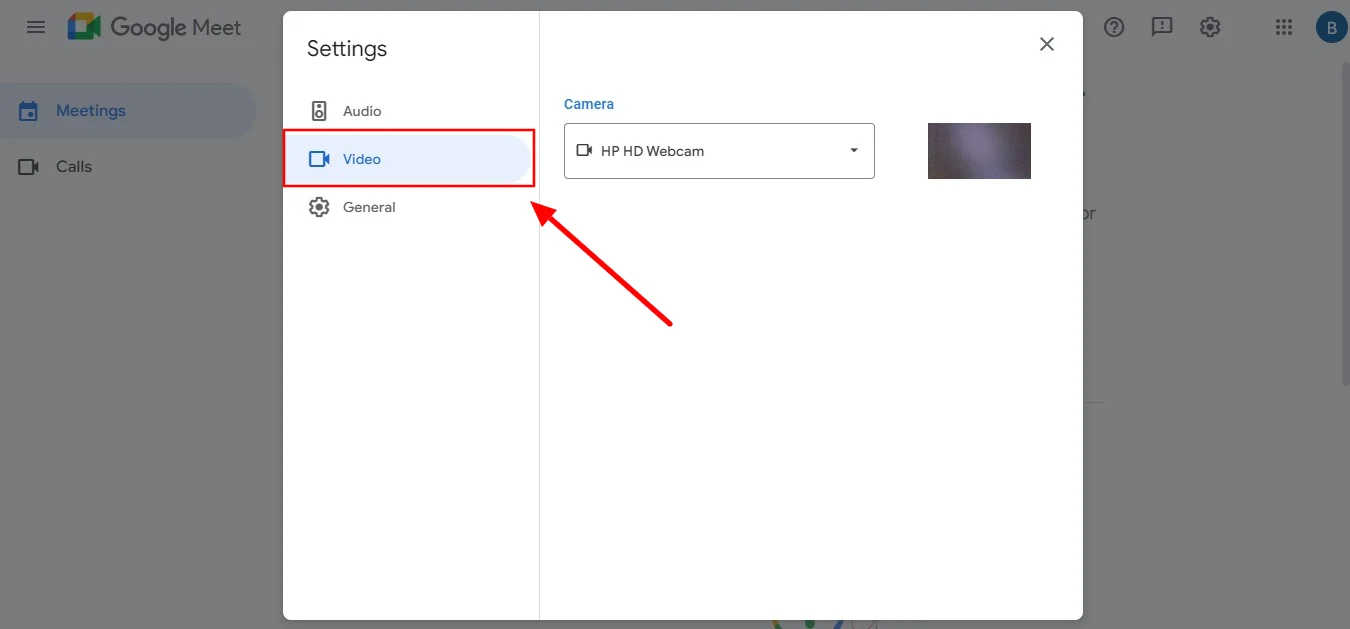
4. Select the default camera option and choose your preferred camera from the list.
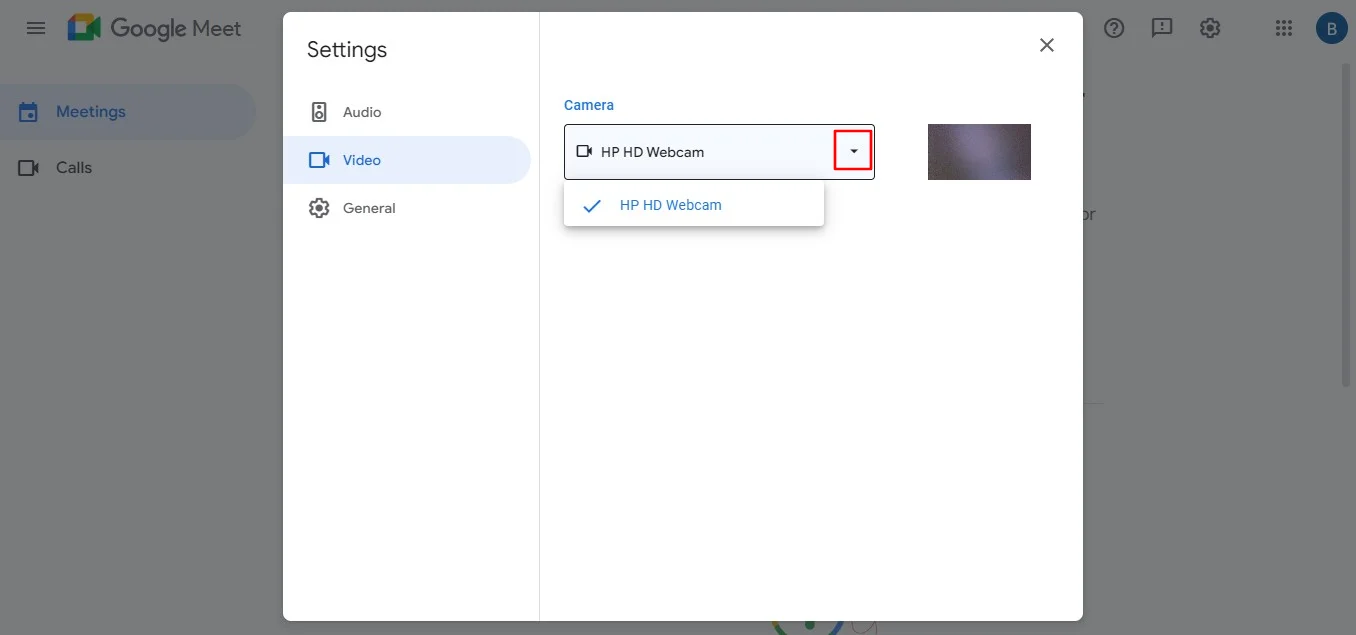
5. Once selected, your default Google Meet camera is updated. Join a meeting to verify any improvements.
6. Restart and update your computer
While seemingly straightforward, this solution is often overlooked. Temporary glitches can occasionally interfere with browser functions. To resolve this issue, manually close all tabs and then restart the browser. Additionally, ensure the latest version of your browser is current by checking for pending updates.
If all else fails to resolve the issue, it might be necessary to update your device's operating system. While Windows typically installs updates automatically, you can manually check by clicking the Start button and typing "update." Then, select "Check for updates" and proceed with any available updates.
7. Ensure that your browser can access Google Meet
Browser settings or updates might mess up your Google Meet camera, causing it to act up or show a black screen. Let's take a look at how to resolve this issue.
- Clear browser cache: Go to your browser settings, find the option to clear browsing data, and select cache and cookies. Then, clear them out.
- Try another browser: If one browser isn't working, try another. Sometimes, different browsers can handle Google Meet better.
- Check hardware acceleration: Browsers sometimes have this feature that can cause problems. Turn it off in your settings and see if it fixes things.
Conclusion
If you've encountered camera issues during a Google Meet call, don't stress! The troubleshooting steps outlined above should help you identify and resolve the problem quickly. By checking the correct camera call permissions, ensuring no other apps are using the camera, and verifying you have the latest software updates, you'll be back on camera in no time.
For seamless Google Meet experiences that extend beyond video conferencing, consider Bluedot. While resolving camera issues is important, capturing the valuable content discussed in meetings, especially when screens are shared, is essential. Bluedot offers automatic transcription, but it also excels in secure meeting recording.
With Bluedot, you can focus on the conversation while it intelligently records every word and screen share for future reference. It even saves your Google Meet recordings for later.
Bluedot provides a one-stop shop for recording, transcription, and even generating meeting notes, making it an invaluable tool for any Google Meet user. Try our free extension.
%201.svg)
